It's funny how tracking your diet for a project becomes the mother of culinary invention. The prospect of telling someone my favorite snack of the moment happens to be wheat toast, 1 oz chevre cheese, a drizzle of honey and smoked sea salt from trader joes seems harmless enough. That is, until I realize that I am adding both sugar and salt to something that has a decent amount of both already. So, I set about my kitchen to find things with a nominal amount of caloric input to replace the honey and salt.
Freebies in this regard are generally spices and herbs. I also consider any vegetables to also be freebies since they are usually not very calorie dense.
So, this is what I came up with:
1 piece whole wheat toast
1oz Chevre
1/4 tsp curry paste
1/2 Tbsp fresh cilantro, chopped
This may not seem like a giant difference. Both snacks are within a decent calorie range and have a good portion size. They both contain whole grains, dietary fiber, and calcium. The total calorie difference is probably about 20 calories and perhaps half the added sodium. The more important differences are that I substituted empty honey calories for vitamin rich cilantro (A, K, C, antioxidants) and straight salt for curry paste which has trace vitamins and is spicy enough to keep me from going back and eating seconds when I am not hungry.
Monday, October 10, 2011
Divine Carrot, Ginger, Coconut Soup
So, this soup is amazing. I'm not gonna lie. And easy.
Super easy.
If you want a thai flair to your soup, add some fish sauce for a little tang. I think it tastes best that way. If you are watching your sodium, omit it.
1.5 pounds carrots, peeled and chopped the same size.
2 Tbsp fresh ginger root, minced (halve this if you think ginger is spicy)
5 cloves garlic
Enough water to cover the carrots by about an inch.
10 oz. coconut milk
2 tsp rice vinegar
Serves: 8
Boil the carrots until they are easily pierced by a fork (about 40 minutes). Blend until smooth.* Add extra water if you need it to make sure the carrots blend smoothly. I found that a standard drink blender gives you a much smoother product than blending in a food processor does.
Pour the carrot mix back into the pot. Add the coconut milk and vinegar. Bring up to a boil while stirring. And that's it.
*Remember to take special care when belnding hot foods. Always use a lid to cover the blender and hold the lid tightly to the machine with your hand while processing. Thick liquids like this will also save a giant air bubble to burst right as you pull the top off to look in. I can tell you from personal experience that hot soup puree hurts like the dickens.
Tuesday, September 13, 2011
(Dairy Free) Creamy Potato Corn Chowder
So, I desperately wanted to make a dairy free version of chowder since I am trying not to eat any dairy at all. This particularly tough since the best part of chowder is the thick, rich dairy flavor and the butter drizzled over the top.
To begin with, I wanted to make a veloute sauce which is a standard french sauce made with a roux made of flour and butter/oil/animal fat, cooked, with chicken or beef stock added until the flour cooks out and your are left with a silky vat of soupy deliciousness. Think of a thin thanksgiving style gravy. I know it sounds terrifically unhealthy, but, properly prepared, it is quite healthy, especially when compared to a cream base for soups.
This soup takes about an hour and a half to make, but for 45 minutes of it, you only have to pay attention enough to stir it occasionally. I will tell you what I did, then tell you what I would have done if my pantry had been a little better stocked. As it was, the soup got rave reviews.
SOUP BASE:
1/2 cup olive oil
2/3 cup flour
2 quarts water
3 red potatoes, peeled and cut into small pieces
2 tsp rosemary and thyme, chopped fine
Heat a large stock pot over medium heat and add the oil and flour. Cook until lightly browned, stirring constantly. Using a whisk, add half the cold water while whisking vigorously to break up any lumps that want to form. Add the rest of the water. Turn up the heat and bring the pot to a boil. Once it has boiled add the potatoes and herbs and bring to a boil again. Turn the heat down to low until there are very few bubbles forming. Allow the soup base to simmer for about 45 minutes or until the flour taste disappears an the base no longer tastes starchy. Skim the foam that forms on the top. Adjust the thickness of the soup base by adding more water if it gets too thick.
Most of the potatoes should have broken down by now. If they haven't, cook until they are very soft. Use the whisk to break up the remaining lumps of potatoes. This is your soup base.
GARNISHES:
3 pieces of bacon (optional) cut into 1/4 inch pieces
1/2 cup onions, diced
1 red potato, cut into 1/4 inch pieces
1 can corn (not drained)
1 tsp thyme, rosemary and parsley, mixed and chopped fine
salt
pepper
1/2 tsp red wine vinegar
Saute the bacon pieces until they are brown and crispy (don't drain the fat, this will add flavor to the soup and be a negligible amount of fat when dispersed over all 10 servings). Add the onions and cook until fragrant, add the potato. Cook on med-high heat until the potatoes are evenly browned (approx. 10 minutes). Add the can of corn with the liquid in the can (adds more corn flavor). Add everything in the saute pan to the soup pot and bring up to a boil. Turn off the heat and add salt, pepper and red wine vinegar to taste.
10 servings
If I had my way when I was making the soup base, I would have used vegetable or chicken stock instead of water. I also would have added 2 bay leaves and half an onion. I also really wanted to added smoked salmon to this, but had none. If I had added salmon, I would have used fish stock in the soup base and garnished with chives or green onions.
Easy Braised Greens
This is the simplest and quickest way I know of to prepare braised greens. It even won over my dad who was dead set against liking them.
1 Tbsp olive oil
2 cloves garlic, minced
4 cups braising greens (see previous post)
1 Tbsp water
1 Tbsp red wine vinegar
1/4 santaka chili flakes (optional)
Salt and Pepper
Heat a large saute pan that has a lid. Add the oil and garlic and heat until fragrant. Add greens, water, vinegar and a pinch of salt and pepper. Stir quickly and put the lid on. Cook until the greens have collapsed and turned bright green. You still want the greens to have a bit of structure to them. If you cook them too long, then they will turn slimy.
How to Clean Braising Greens
Using braising greens can be a bit daunting for a novice. But, once you get used to them, they are an invaluable way to add more vegetables to cooked dishes and they make a delicious side dish when braised. They can also be marinated in a vinaigrette for a couple hours until they break down a bit and are easier to chew and digest.
Braising greens is kind of an umbrella term that encompasses (but is not limited to) the following: kale, tuscan kale, beet tops, rainbow chard, turnip greens, and collard greens. This general term indicates the darkly pigmented leaves that are generally quite sturdy and hold up to cooking. Some are tougher than others. You can roughly gauge how long it will take to cook greens relative to each other simply by feeling how tough the leaves are between your fingers.
One thing to note with braising greens is that, by definition, they have a very strong taste. Each of the greens are chock-full of vitamins which can make them tend towards a bitter flavor. This is why it is a good idea to mix your greens. Since each plant has a distinct flavor, by mixing them, the flavors cancel each other out to a small degree. Beet greens and tuscan kale are more neutral flavored than many braising greens, so they are a good place to start.
To prepare greens, rinse all dirt from them, especially the bottom of the stems where dirt tends to cling. You want to separate the leafy green parts from the fibrous stems. Begin by holding the stem in your hand and pulling the leaves off trying to leave as much of the stem intact as possible. Then, tear the leaves into manageable sized pieces (approx 3 in by 3 inches or less). Remember that the greens will cook down a lot. A full 9 inch saute pan will cook down to about 1/2 cup of cooked greens.
Now, keep your braised greens in a sealed plastic bag in the refrigerator until you can use them. Leaving them in the open air in the refrigerator will cause them to wilt.
Carrot Top Vinaigrette
Using the produce from previous post, I was loathe to treat such delicious looking carrot tops in my usual manner (which is just to chuck them in the trash). So, a few quick google searches later, I find out that not only are they not poisonous, they are in fact a good source of vitamin K which is generally deficient in the carrots themselves.
Carrot tops, in case you are as ignorant to their flavor as I was, taste very green and are pretty bitter. They are similar to curly parsley in respect to flavor, texture and usefulness. Used in a vinaigrette, they are quite good and this made a delicious salad dressing as well as a fantastic sauce on salmon. The measurements are approximate as I had to adjust the flavoring and didn't write down my measurements.
I wouldn't suggest trying this recipe with limp or old carrot tops as they are not as likely to have the same great flavor.
1 cup loosely packed carrot top greens (very fresh)
1/4 cup green onions, chopped (white and green parts)
1 Tbsp cut chives
1 tsp mustard
3 cloves garlic, chopped
2/3 cup rice wine vinegar
1/3 cup olive oil
1/2 tsp sugar or natural sweetener
salt and black pepper to taste
Put all but the sugar/sweetener and salt and pepper in a blender or food processor and blend until uniform. Adjust the flavoring with the remaining ingredients.
I chose to use the rice wine vinegar because it would not compete with the green flavors of the vinaigrette. Red wine vinegar could be easily substituted. I also used olive oil to complement the green flavors. If you don't like olive oil, grapeseed oil or rice oil could be easily substituted.
Roast them beets!
Two days ago, my mom stopped to pay a house call on a friend in a somewhat doctorly capacity. In return, her friend let me have at her garden with scissors and only my conscience to check my zeal. It makes me wonder why they ever stopped paying house calls that paid in trade. Alaskan grown produce pulled straight from the dirt on the sunny side of the valley is about as fresh as you can get.
For the last two days, I have been cooking from what we got and here are a few recipes. It turns out, the fresher your produce is, the less you want to manipulate it. So, these are generally simple, healthy recipes.
I will post them separately for ease of later reference.
My meal last night consisted of roasted beets, carrot top vinaigrette, braised greens, garden salad, grilled salmon patties (frozen from costco, but delicious), and israeli couscous cooked with a small amount of salt.
Here's my failsafe method for roasting beets. It's a well established method and I don't dare take credit for it lest someone's great-great-grandmother haunts me for my impudence.
Preheat the oven to 425 degrees. If you are cooking other things in the oven, you can turn the heat down, just be aware that they will take much longer to roast at lower temperatures. Even at 425, beets will take a minimum of 45 minutes to roast.
So, scrub the beets clean of dirt, cut the greens off the top one inch up the stalks (save the greens for braised greens) and cut the root off leaving about a half inch of the root. The reasons for leaving the extra inch of stem and root are to keep the beet as sealed in its skin as possible. If you cut the tops off or cut the beets in half, they will lose a lot of their moisture and the delicious beet juice that keeps them sweet.
So, take your beets and put them in the smallest covered dish you have that they still fit in while in one layer. If you need to roast a large amount, you can put the beets in a roasting pan and cover with foil. Add 1/4 inch of water in the bottom and put in the oven on the middle rack. The cooking time depends on the oven temperature and the size of the beets. Unless the beets are the size of ping pong balls, they will cook for at least 45 minutes.
Check for doneness by poking with a fork. The fork will easily pierce through the flesh of the beet through the middle. If they are still resistant, put them back in the over for a minimum of 8 minute intervals. Remember, each time you poke them with a fork or open the roasting dish, you are losing moisture in your final beets.
When they are finished, let them cool until you can handle them. Peel by pushing on the skin fairly lightly. The skin will be loose and you can peel it just using your fingers. If you have a dark red variety of beet, the juice will stain your fingers quickly. If you have a problem with that, you might want to obtain some plastic cooking gloves or buy the golden or chioggia varieties of beets that have very little pigment comparatively. Cut them in the shape desired and serve.
Beets cooked in this manner can be stored and reheated by roasting in an oven until they start to brown or cooked quickly in a saute pan. They can be used cold on salads or as their own salad with a little vinaigrette.
If you attached to the beautiful colors of the rainbow or golden beets (some of them are even candy cane colored) I suggest storing them away from the deep red beets. Almost immediately on contact, the red pigment will dye the other beets.
Adding Flavors:
Straight out of the oven, fresh beets barely need any flavoring added. Generally, I just add a tsp of olive oil, 1/4 tsp red wine, and a dash of salt and pepper to approx. 3 cups cut beets.
Alternatively, you can drizzle a vinaigrette that matches the rest of the meal you are serving.
If you wish to add flavors while roasting, feel free to add garlic and strong herbs such as rosemary or thyme. You can also add whole spices to add to the flavors. Many people like to add sweet spices such as cinnamon sticks and allspice, but I find that they bring out bitter notes in the beets that I don't particularly like.
Saturday, June 25, 2011
Drunken Corn and Lentil Soup
At first, I wasn't so excited about this soup. But, like many healthy recipes, each bowlful tastes better and better. Prepare for this phenoma when determining serving size....
Last night I fell asleep thinking about how to make a corn puree soup with the meager ingredients in my kitchen. It turned out pretty well considering what I had stashed in my cupboards and freezer. I wanted to post this so you could see the thought process that goes into making a puree soup with ingredients that don't quite break down when blended.
Both corn and lentils have insoluble fiber that don't break down with cooking or digestion. You can either have a chunky-style puree which you have to chew your way through, or, you can strain the entire thing through a fine sieve which gives you a very thin, broth-like soup. The problem with the broth is you lose all that insoluble fiber that gives bulk to the soup and keeps your digestive track running smoothly. I chose to strain 2/3 of the soup through the sieve and add the rest of the puree without straining. This gave it a nice pureed soup consistency.
I was going to make a strictly vegetable puree soup, but I have been trying to get multiple food groups into my dishes, so I opted for lentils which are a grain. I also used beer for flavor which can be substituted for vegetable stock. The alcohol cooks out of this within the first couple minutes of boiling, so, there is no worry about serving this to minors.
Puree:
1 Tb Olive Oil
1/2 Onion Diced
2 carrots peeled and diced
3 large cloves garlic
1 12oz light-colored beer
1 dried guajillo chile, top cut off and seeds taken out (you can find dried chiles in the mexican section of grocery stores)
2 bay leaves
1/2 32oz bag frozen corn (make sure you have more to add after pureeing)
32oz water
2 cups lentils, mostly cooked
Garnish:
2 cups frozen/fresh corn
1 cup Lentils, mostly cooked
1 fresh serrano chile, seeded and minced
1 Tb curry powder
1/2 tsp hungarian paprika
2 tsp sugar
2tsp red wine vinegar
1 tsp salt
Cook the lentils in a few cups of water until they are almost cooked through. Stain and set aside. You will want 3 cups of lentils cooked. This takes maybe 15-20 minutes.
Heat a stock pot (at least a gallon size). Add the olive oil, onions, carrot and garlic. Sautee until the onions start to get transluscent. Add the beer and boil until you don't smell the alcohol anymore. Add the bay leaves, chile (leave it whole so you can pull it out before pureeing), frozen corn and lentils. Heat until boiling. Add the water. Bring up to a simmer. Let this cook (without a lid, you want some of the water to boil off) until all of the ingredients are tender, bordering on mushy. This takes approx. 45 min to 1 hr.
Remove the chili. If you want to, scrape the inside of the chili and add this back to the soup. In batches, puree the soup with a blender, immersion blender or food processor. This is a good time to send the first half of the soup through the sieve into another container. When the stock pot is empty, rinse it out and put the puree back into the pot. Add the garnish ingredients and bring back up to a simmer and cook the lentils the rest of the way though. The last things you want to add are the sugar, salt and vinegar. Add these things slowly to the soup to make sure you don't add too much.
Servings: 6 - 8oz bowls.
Notes: This soup is not spicy at all. If you want to kick up the spice, add more guajillo chilis or add some of the serrano seeds. Feel free to substitute any grains for the lentils and any fresh/frozen vegetables for the corn. Also, if you have fresh herbs, chop them up and add them to your bowl. I really wanted cilantro and more serranos in my soup.
Thursday, June 9, 2011
Peanut Butter and Banana Oatmeal
I know. I know. You are dying to know if I came up with a new oatmeal for today. The answer is: Yes! Of course! I am willing to bet I could come up with a new oatmeal every day for the rest of the summer. In fact, I just might do it for fun. It's not important that I can make a different oatmeal every day. What is important is that I can show you how to make something healthy and cost effective into dozens of different dishes that will keep you coming back to the same healthy ingredients. For example, I used basically the same ingredients for 3 days adding one or two and subtracting them as needed. What I came up with was three distinct recipes and it kept my interest in oatmeal from waning. Plus, these are the healthiest breakfasts I have had in a long time.
Here's today's variation:
2 tsp Peanut Butter
1/2 banana, chopped
1 cup water
1/2 cup oatmeal
1 tsp flax seeds
1/4 tsp molasses
Dash of salt
1/2 banana sliced on top
Add peanut butter, and 1/2 banana to water and bring to a boil. Add the oatmeal and cook to desired consistency. Stir until the banana and peanut butter are full mixed into the oatmeal. Add just enough molasses to lightly color it and season with a very small amount of salt. Add slice bananas on top.
The verdict: Delicious. Very creamy. It would be better with some crushed peanuts on the top.
Side note: The addition of flax seeds to the oatmeal is highly recommended. They add a little texture and are visually stimulating.
Wednesday, June 8, 2011
Oatmeal with Bananas and Nutmeg
The post where I put all my theories to test from yesterday and continued the oatmeal experiment...
The recipe was the same as yesterday except, rather than eat the banana while cooking the oatmeal, I added the banana to the oatmeal. I added some nutmeg which goes great with bananas (think of banana bread) and changed the maple syrup to honey. I can tell you that I definitely tasted the lack of salt in this recipe more than I did yesterday. I think part of that might have been that I didn't add the trail mix to the oatmeal while cooking. Also, I found out yesterday while researching the nutrition content of the trail mix that the almonds in it are tamari roasted. Not the best flavor profile for oatmeal, but such are the hazards of bulk shopping in a hurry.
Today I started by chopping half the banana and adding it to the water as I was bringing it up to a boil. I was hoping it would break down and make the oatmeal creamy without having to add dairy or dairy substitutes. It did just as I had planned. This should work as long as you have a banana ripe enough to be fragrant or bananas that are too ripe to eat normally. While cooking, there's a fantastic banana aroma every time you lift the lid to check your oatmeal. I saved the other half of the banana to add at the end to get that fresh banana flavor.
I also added nutmeg to the boiling water and sprinkled some on top at the end. You can substitute any sweet spice for the nutmeg (i.e. cinnamon, allspice, clove) or if you want to get creative, try fennel seed, coriander or cardamom seed.
I cooked the oatmeal with the lid on which sped up cooking and kept in much more liquid. I liked the texture of the oatmeal better. The oatmeal was creamy and the indiviudal oats stayed intact. I would recommend this method if you have a sauce pan with a lid.
As for the nuts, I sprinkled them on top at the end. I could have easily used half the amount of nuts from yesterday as the 1/8th of a cup looked like a lot (even after I ate the tamari almonds before putting them on my oatmeal). If you are counting calories, this might be a good visual trick to lower your intake of high fat nuts.
How good did it taste? Well, I wasn't a fan of this nut mix in this oatmeal. It was too strong. I would have preferred pecans or brazil nuts. But, while I was writing this post, I kept looking over to the bowl just to make sure more oatmeal hadn't magically appeared. I'm pretty sure that's a good sign.
Tuesday, June 7, 2011
Oatmeal On the Cheap!
So this post will be a little different. I am about to go back to school and become very poor. I am also going back to school for nutrition, so, I am going to try and make meals this summer that are nutritious, cheap and also (hopefully) delicious.
This morning I went out and bought bulk oats (Bob Red Mill, thick cut), bulk flax seed (for omega 3's and fiber) and bulk trail mix to add to my oatmeal. I like thick rolled oats since they are a little more chewy and they are less (for lack of a better word) gooey. I also ended up sneaking in about a half tsp of maple syrup that I have had forever and no longer remember the price for. As it is about 1/80th of the bottle, I am think it's about 10 cents.
On a side note, I looked up the instructions on how to cook the oatmeal on the Bob's Red Mill website. They suggested cooking you oatmeal with 1/4 tsp of salt for each 1/2 cup serving. I thought it sounded reasonable until I looked on the salt container and realized that was 24% of the daily recommendation. I guess I am in for an eye-opening experience if I want to keep on the healthy side of my sodium intake. In the restaurant I work in, we use salt in everything and we use a lot of it.
Here's how I made my oatmeal this morning (serves one adult).
1/2 cup rolled oats
1 cup water
1/8 cup trail mix (mixed nuts and raisins)
1 tsp brown, whole flax seeds
Tiny dash of salt
1/2 tsp maple syrup
First I brought the water and salt to a boil. Then I added everything and let it cook for about 10-15 minutes until the oats were cooked through. Depending on how you like it, they recommend cooking between 10-20 minutes. I didn't put the lid on during cooking, but I think I will next time. I ended up adding extra water since the oats absorbed everything and I wanted it to have oatmeal texture. I also stirred it quite a bit at the end to break up the oats and make it a little more glutinous.
This was delicious and very healthy tasting. So, if you aren't used to eating healthy things you might find it to be not sweet enough or salty enough. Feel free to add more sugar and salt when you first make it, then try to wean yourself down as far as possible. By the end of it, you won't miss the sugar that much.
And now for the money reveal:
Oatmeal: $.19
Flax seed: $.01
Trail Mix: $.54
Maple Syrup: $.10
Total: $.84
Oh, and I had a banana that was on sale for $.20
All this for a meal that was whole grain and under 400 calories. It also had about 1 1/2 servings of fruit, 2 servings of grains and plenty of fiber, protein and almost all the sugars came from a banana.
Monday, May 30, 2011
Jen and Rob's Housewarming BBQ
So, I accidentally produced a healthy, dairy-free BBQ menu for my sister's housewarming party. Funnily, we bought sour cream and shredded cheese to serve but ended up forgetting about it. I am going to post the recipes separate, because if I put them all together, this would be a very long post.
First things first, Jen made a masterful culinary breakthrough by asking if we should grill the corn on the cob with the husk still on. I hadn't tried it that way, so I suggested husking half of it and grilling the traditional way (for me at least) and the other half with the husks still on. Hands down, everyone loved it with the husks on. You want to cook it on the upper rack, if you have one, or with low heat until the husks get a bit charred and fragrant. They end up smelling like tamales and the corn is perfectly steamed.
The total menu for the BBQ:
Marinated chicken kabobs
Marinated Vegetable Kabobs
Grilled Corn on the Cob
Spanish Rice
Romaine Salad with Lime/Cilantro Vinaigrette
Refried Beans (from a can)
Housemade salsa (which didn't work so well as tomoatoes are very out of season)
And the Coup de Grace: Dessert of grilled pineapple, lime/coconut milk cream and housemade blueberry syrup
Recipes to follow...
Tuesday, May 24, 2011
Lamb with Snowbank Morels, Braised Greens and Wilted Pea Shoot and Bok Choy Salad

So, I made a base vinaigrette that serves as a sauce for this whole dish. You should make this first, then cook the rest of the items. I made it in a mortar and pestle, but it would be much easier in a blender.
1/4 cup mint leaves
2 T green onions chopped
1 tsp fresh ginger, chopped
1/4 cup olive oil
2 T red wine or rice wine vinegar (I used the daikon pickle brine from the previous recipe)
Salt, to taste
Add all ingredients and blend. You can make it as smooth or chunky as you want.
Side salad:
One small head of bok choy, chopped large
About 6 pea shoots, chopped large
Small amount of daikon pickles chopped
1 Tsp mint dressing (above)
Add all ingredients to a bowl and toss until leaves are uniformly coated by dressing. Let this sit while preparing the rest of the dish. This will wilt the greens.
Lamb and Braised Greens
2 oz lamb meat cut into 1 inch cubes
2 snow bank mushrooms chopped
1 T mint dressing (above) used instead of oil
Heat a medium sized saute pan. Add mint dressing as you would oil. When hot, add lamb meat and morels and toss to coat. Heat for several minutes until the lamb has a nice coloration. Set aside on a plate and cover to keep heated. Use the same pan to quick-braise the greens. In this instance, I used kohlrabi greens and tuscan kale, but feel free to use whatever greens you like.
2 cups mixed greens (tuscan kale and kohlrabi greens are pictured) chopped large
1 T water
1 tsp red wine vinegar
1 tsp sambal oelek or red pepper flakes
salt, to taste
Put the pan back on the heat. Add add all the ingredients except the salt and cover with a lid. Cook until the greens are bright green and shiny. Season to taste with salt. Add the greens and salad to the plate with the lamb and enjoy!
This was my first time eating kohlrabi greens. They are much more fibrous and pungent than the tuscan kale, but still good. The snowbank mushrooms were the perfect pairing for the lamb. I don't know that I have ever had lamb with mushrooms, but I would do it again in a heartbeat.
Daikon Pickles
One of my favorite things to make at work is pickles. There are endless variations of vinegars, vegetables and seasonings to add to make endless variations of pickles. I have been pondering using fresh herbs in pickles for a long time, so I decided to infuse rice wine vinegar with mint for this version. Be careful, making pickles makes your house smell of vinegar, so you should do it on a day when you can open up the windows and air it out.
If you aren't familiar with daikon, it is a root vegetable shaped like a large, blunt carrot that is white and relatively mild with a little kick of spiciness.
12oz Rice Wine Vinegar
1/2 bunch of mint
Put vinegar and mint (stems and all) in a non-reactive (stainless steel or non-stick) in a saucepan and bring up to a boil. Remove from heat, cover and let sit 20 minutes.
12oz water
1 T coriander seed
1 cinnamon stick
1/4 cup salt, preferably non-iodized, sea salt or kosher salt (iodized salt will make your pickles taste bad)
1/4 cup sugar
Heat a large non-reactive stock pot. Add spices and toast until fragrant (maybe for a minute or so). Add the water. Strain mint-vinegar into stock pot and discard mint. Add the remaining ingredients and boil for 5 minutes. The pickles will continue to cook until the brine cools completely, so you want them not quite done when you pull them from the heat. Taste them. When they are just a little too cruchy for your taste, pull them off the heat.
Remember, hot pickles will taste different than they will when cool. Once cool, store them in the refrigerator with all of the brine and seasonings. Over time, the seasonings will impart more flavor to the pickles. These should last for about a month. This is a fairly salty pickle, so feel free to reduce the amount of salt or add more sugar.
These are great eaten from the jar or sliced and put on salads.
If you aren't familiar with daikon, it is a root vegetable shaped like a large, blunt carrot that is white and relatively mild with a little kick of spiciness.
12oz Rice Wine Vinegar
1/2 bunch of mint
Put vinegar and mint (stems and all) in a non-reactive (stainless steel or non-stick) in a saucepan and bring up to a boil. Remove from heat, cover and let sit 20 minutes.
12oz water
1 T coriander seed
1 cinnamon stick
3 cups daikon, peeled and chopped into uniform shapes (I cut them into half moons)
1/4 cup chopped green onions1/4 cup salt, preferably non-iodized, sea salt or kosher salt (iodized salt will make your pickles taste bad)
1/4 cup sugar
Heat a large non-reactive stock pot. Add spices and toast until fragrant (maybe for a minute or so). Add the water. Strain mint-vinegar into stock pot and discard mint. Add the remaining ingredients and boil for 5 minutes. The pickles will continue to cook until the brine cools completely, so you want them not quite done when you pull them from the heat. Taste them. When they are just a little too cruchy for your taste, pull them off the heat.
Remember, hot pickles will taste different than they will when cool. Once cool, store them in the refrigerator with all of the brine and seasonings. Over time, the seasonings will impart more flavor to the pickles. These should last for about a month. This is a fairly salty pickle, so feel free to reduce the amount of salt or add more sugar.
These are great eaten from the jar or sliced and put on salads.
Strawberry Smoothie
This is a very easy and healthy smoothie.
3/4 cup strawberries with the tops cut off
1/2 cup nonfat plain yogurt
1/2 cup vanilla soymilk
1 tsp honey
Blend and enjoy!
Smoothies are always a quick and delicious way to get fruit and proteins in the morning. The yogurt provides the protein in this recipe. If you need more energy in your smoothie, you can always add peanut butter or other nut butters. If you want it creamier, you can add a banana. If you want it to be colder and bulk it up calorie-free, add some ice. All sorts of fruits are great for smoothies.
Saturday, May 21, 2011
Farmer's Market Greens and Pasta
So, my meal today was inspired by my trip to the farmer's market. It's so easy to forget the abundance and quality of produce that is at the market. When I first got there, I was the proverbial kid in the candy store until I settled myself down by eating a bowl of dal (indian lentils with brown rice). Thus sated, I was able to think clearly and ended up buying strawberries, small bok choy, kohlrabi with attached greens, tuscan kale, pea shoots, a gigantic daikon (which I mean to pickle) with attached greens, green onions, mint and some lamb stir fry cuts. Oh, and I picked up some snowbank mushrooms because they are almost out of season. So, that is probably what I will be posting about for the week to come.
This is the simplest meal I have had in a long time. The only seasonings are butter, olive oil, salt and red wine vinegar so you get a lot of that refreshing green flavor that comes from spring greens. Make sure you have all of you ingredients prepped before putting the pasta in the water. Sauteeing these vegetables should take no longer than the 7-8 minutes it takes to cook the pasta.
2 tsp butter
2 tsp olive oil
1 small head of bok choy sliced in half
1 T sliced green onions
2 leaves tuscan kale, sliced into 1/2 inch strips
Handful of pea shoots
1 cup pasta
1 tsp red wine vinegar
salt to taste
Heat 1/4 the butter and olive oil in the pan. Add the bok choy and sutee for 1 minute. Add the onions and kale. Drizzle a 1/2 tsp of vinegar in the pan and cover with a lid (this will steam the kale). Cook for a few minutes until the kale is deep green and starting to wilt. Put contents of the pan on a plate. Add another 1/4 of the butter and olive oil to the pan and add the pea shoots turning so they heat evenly. The leaves should wilt and the stems should still be a little crunchy. Add the pea shoots to the plate with the kale. Cover with a lid to keep heated while finishing the pasta.
Drain the pasta and add to the pan you cooked the vegetables in. Add the remaing butter, olive oil, and 1/2 tsp of vinegar and toss to coat. Serves 1.
This isn't a showstopper presentation-wise, but it is delicious and packed with nutrients and high in vitamins A and C. I chose tuscan kale because it is one of the milder cruciferous greens. I found recently I had problems eating more than a small amount of turnips greens because the taste was so pungent. It turns out tuscan kale is delicious.
Wednesday, May 18, 2011

Warm Asparagus, Mushroom and Farro Salad
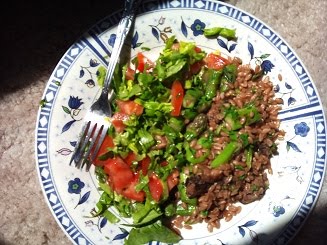 So, here was my quick lunch. All together, it took about ten minutes from start to eating. I had farro left over from a previous meal, so it was pretty much chop, sautee, chomp. It was good and simple, not necessarily show off to your guests good. I used Snowbank Mushrooms in this which are also referred to as False Morels. They have a softer texture than morels which might be a turnoff for people who don't like mushrooms, but they are highly flavorful and quite fantastic.
Side Salad:
Chopped Romaine
Chopped Tomatoes
Sliced Green Onions
Parsley, chopped
Dash of Red Wine Vinegar
Dash of Olive Oil
Salt
Toss and Serve.
Aparagus and Farro Salad
1 T butter (sustitute olive oil for vegan dish)
Bottom parts of green onions, chopped
4 spears chopped asparagus
1/4 cup snowbanks mushrooms, chopped
1/2 cup cooked farro
Parsley, chopped
salt, to taste
Heat the butter in a saute pan. Add the onions and cook until fragrant. Add the asparagus and mushrooms and saute until starting to color. Add the farro and cook until warmed. Finish with parsley and salt.
Wednesday, April 27, 2011
Huckleberry-Basil Vinaigrette
So this was a solution I came up with for a huckleberry jam that I bought that was insanely sweet. You can substitute any jam for it or fresh/frozen berries if you have them on hand. You'll need a mortar and pestle or a blender. This will give you about 3 salads worth of dressing. It tastes amazing on baby spinach.
The main flavorings in this are the berry, a fresh green herb, and fresh/spicy garlic flavor. So don't use dried herbs or pre-minced garlic. The dried herbs will make the vinaigrette taste flat and the pre-minced garlic will give an oxidized, musky or slightly metallic taste to the vinaigrette. You would be better off finding a vinaigrette recipe including mustard and more ingredients if using those products.
1 T Huckleberry Jam
1 T fresh basil sliced
1 clove garlic minced
Pinch of salt
Pinch of black pepper
2 T olive oil
If you are doing this in a mortar and pestle, mix all ingredients except for the olive oil and grind until fully incorporated. Add oil and season to taste. If you are doing this in a blender add it all in, blend and season to taste.
Possible variations:
Strawberry/Basil/ Mint Vinaigrette
Orange/Cilantro Vin
Strawberry/Cilantro/Lemon zest Vin
Tuesday, April 26, 2011
Acorn Squash Puree Soup with Coconut Milk
Here's an extremely easy way to make a pureed soup that is creamy without having any dairy in it. You can substitute any root vegetable or squash for the butternut squash to make a slightly sweet soup with a bit of asian flair. I am not sure how potatoes would fare, but I am willing to give it a try someday. Try garnishing with fresh green herbs, a squeeze of lemon or lime, and hot pepper sauces for hot/sweet/sour soups that will taste decidedly southeast asian.
1 Whole Acorn Squash split in half and seeded
4 slices ginger, peeled
6 cloves of garlic
1/2 can full fat coconut milk*
1/2 tsp salt (optional)
1/2 lemon cut into wedges
Roast the acorn squash, skin side down in a casserole that is just big enough to hold them. Add 1/2 cup water to the bottom of the pan. Place 1/2 the ginger and garlic in each of the cavities in the squash. This will infuse the flavor into the squash as it cooks. Set oven temperature at 375 and cook for 45 minutes to 1 1/2 hours checking to see that all the squash is mushy. If there are parts that aren't all the way cooked through, you will end up with a lumpy soup. Let the squash cool and peel the skin off. Save the ginger and garlic to add to the puree. Cut the squash into pieces.
In batches small enough for your food processor, add portions of squash, coconut milk, ginger and garlic. Puree until smooth and souplike. Add water to adjust consistency.
Don't worry if the coconut milk doesn't seem to incorporate into the squash (i.e. there's chunks of white in the yellow) this will work itself out when you reheat it. Puree all of the soup and heat it back up to boiling. Add more cocunut milk if you like your soup creamier. You can add salt and sugar if necessary. Add lemon juice (squeezed from wedges) until the soup lastes slightly lemony.
My favorite way to eat this soup is with cilantro puree (fresh cilantro leaves blended into olive oil) and a squirt of sriracha.
One variation I have made on this soup was with carrots instead of butternut squash. I boiled the carrots until they were tender and used the boiling water to thin the soup as I pureed it. I added a little sugar to bring out the carrot flavor as mature carrots are more bitter than acorn squash. You'll be surprised how much more "carrot" flavor comes out with a small addition of sugar. It also tasted better without any garnishes.
*Always buy full fat coconut milk. Lowfat coconut milk is thinned with water and stabilizers are added. It is better for your wallet to just use less coconut milk and add your own water when necessary.
Sunday, April 24, 2011
Middle Eastern Broccolini
So, since I had all the ingredients, I did a slight variation on my broccolini dinner from the night before and came up with a very different dish.
The bulghur was just wheat bulgur, lemon zest and a dash of cinnamon and nutmeg.
The broccolini was much different... I had medium salsa laying around, so I used that as a base for the sauce. This sauce ended up with a nice kick. You can substitute tomato product for the salsa to cool it down or kick it up with more sriracha and less oil.
1/2 cup salsa
2 T sriracha (rooster sauce, spicy tomato sauce)
1 Tsp Ras Al Hanout (middle eastern spice mix)
2 T dried currants
3 diced moroccan olives
1/4 cup water
1 T olive oil
Cook all ingredients for about 15 minutes until you can no longer taste the graininess of the spices. Add more oil if too spicy.
Broccolini
1 1/2 cups blanched broccolini
1/2 T olive oil
4 small crimini mushrooms, sliced thin
1 T sunflower seeds
2 Moroccan Olives, diced
1/8 cup of the sauce (above)
Squeeze of lemon
Water, if needed
Saute the mushrooms in olive oil until slightly browned. Add the sunflower seeds and toast for a bit. Add the olives, sauce, squeeze of lemon. Add water if need so the broccolini can be tossed in the sauce in the pan. Add the broccolini, tossing to coat, and cook until heated. Serve over bulghur.
No Sugar Added Apple Compote
So, I decided to try to cook apples without adding sugar, juice, or any more calories for a morning yogurt topping. I am also extemely against any sugar alternatives such as splenda, stevia or aspartame, so I didn't want to add any of those. What resulted was very low on the sweetness scale, but surprisingly good for breakfast. I also ended up adding one whole serving of fruit to my lowfat yogurt which makes for a very helathy breakfast. I found myself wishing I had slivered almonds to sprinkle on the top.
1 apple, peeled, cored and diced
1/2 cup water
1/4 tsp cinnamon
2 large pieces lemon zest
corn starch to thicken
squeeze of lemon
Cook apples, water, cinnamon and zest at a low boil until the apples have broken down, but aren't completely mushy. Add water if need to thin out apples to have a bit of water to make the sauce. Add cold water to about a tablespoon of cornstarch, slowly pour it in to the boiling apples while stirring, bring to a boil. Add a squeeze of lemon and stir. Serve over yogurt.
Saturday, April 23, 2011
Greek Style Broccolini with Wheat Bulghur
So, in the interests of furthering my healthy food education, I have decided I am going to try and make a new recipe every day using some seasonal fruit/vegetable and make it either vegan or healthy. Here's the first one: Greek Style Broccolini with Wheat Bulgur! Yeah, it sounds kind of weird and the flavor profile was very different than what I am used to, but once I ate two bites, I couldn't stop. This also was the first time I haven't knee jerked garlic and onions into my recipe (mostly because I didn't have them) and I have to say they weren't missed.
1 cup blanched broccolini (my seasonal veg choice)
3 small crimini mushrooms, very thinly sliced
1 T toasted sunflower seeds
1 T olive oil
8 capers chopped
2 moroccan oil cured olives*, chopped fine
1/2 tsp chiffonaded mint, fresh
1/2 tsp chiffonaded basil, fresh
1 lemon wedge
Bulghur
1/2 cup wheat bulghur
1 cup boiling water
1 tsp mixed mediterranean dried herbs
1 large piece lemon zest
First, boil the water, herbs and zest for the bulghur, add the bulghur, cover and let sit for 20 minutes.
For the veg, saute the olive oil, mushrooms and sunflower seeds until they start to brown. Add the olives and capers and cook until the mushrooms are almost done. Add the broccolini and cook until heated. Finish with a squeeze of lemon and the basil and mint. Take off heat and let cook for 30 seconds. Taste. If it is too salty or sour, add some more olive oil.
*This was my first time trying moroccan olives. They are darker and more pungent than kalamatas and extremely salty. Use sparingly.
Subscribe to:
Comments (Atom)